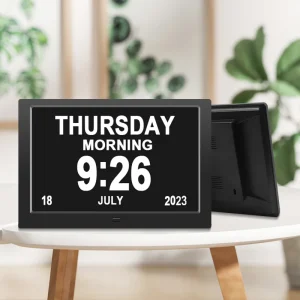
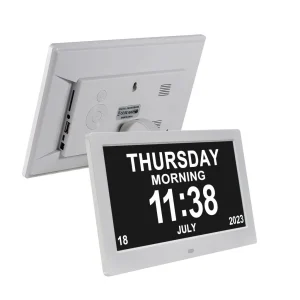
Digital calendar clocks are useful devices that are utilized both at home and in the office. They are quite helpful to those who need memory assistance or planning assistance for a day. Correct time setting must be done for a digital calendar clock in order to work. This guide will help you learn how to set the time on a digital calendar clock so it will continue to remain accurate and will serve its purpose.
Why Is It Important to Set the Proper Time?
You need to set the proper time on your digital calendar clock so that all of its functions, such as alarms, reminders, and scheduling capabilities, can function correctly. For individuals with memory issues, a properly set clock can be reassuring.
General Steps to Modify the Time
While the procedure might differ based on the model and brand of the clock, the following are some steps to be followed in resetting a digital calendar clock:
1.Find the “Setting” Button
Find the “setting” button on your clock. For instance, in BigTimeClocks models, the button is found marked as “A.”
2.Enter Setting Mode
Press and hold the setting button until the numbers on the clock begin flashing. This indicates that you’ve entered the time-setting mode.
3.Adjust the Hour
Once the hour numbers start flashing, press the “hour” button (often marked as “B” on BigTimeClocks) to adjust the hour. Release the button when the correct hour is displayed.
4.Adjust the Minutes
Press the setting button once more to obtain flashing minute numbers. Alter the minutes using the “minutes” button (possibly also the “B” button).
5.Set Extra Values
If your clock also displays extra values, e.g., the year, month, or day, do the process for each value. Press the setting button to select the value which you would like to modify and then set it using the respective button.
6.Save the Time
After setting the time, press the “save” button (on BigTimeClocks, this is probably the “C” button) to store your settings.
7.Special Instructions for Common Models
DayClox Digital Calendar Clock
To set the time on a DayClox digital calendar clock:
1.Enter Menu
Press the menu button once to bring up the settings menu. The language choice will be highlighted in yellow.
2.Choose Set Time
Press the down button once to yellow-highlight “Set Time.”
3.Acknowledge Selection
Press the OK button. There will be a blue underline below the hours.
4.Set the Time
Either the up or down button can be used to set the hour. The same buttons can be used to set the minutes.
5.Save the Time
Press the menu button again to save the time and return to the clock display.
6.Digital Clock Systems
For Digital Clock Systems, procedures to set the time can be different for different models:
- Infrared Remote Control:For a pre-printed vinyl zone name clock, initialize the time using the infrared remote control.
- DDS Timenet Software: For a model whose model number ends with -USB, initialize the time using DDS Timenet software. Get the software from Digital Clock Systems’ website.
- Infrared Remote Keyboard: For models whose model number ends with -IRRK, use the infrared remote keyboard.
Ethernet/NTP Sync:
ETHR model number time zone clocks will automatically sync to an external or local NTP server.
TabTimer Day Clock
To configure a TabTimer Day Clock:
1.Access Menu
Press the menu key to bring up the on-screen menu.
2.Navigate the Menu
Press the up or down keys to navigate to the setting you wish to change.
3.Adjust the Settings
Use the left or right buttons to underline the area of text you want to modify. Use the down or up buttons to input changes after underlining.
4.Set Time and Date
Highlight “Set Time” to modify the hour and minute. Next, highlight “Set Date” to modify the day, month, and year.
5.Save the Settings
Press the menu button to save the modifications and return to the main display.
Troubleshooting Tips
- Check Manual: Refer your clock’s own manual for individual guidance.
- Secure Power Supply:Ensure your clock is firmly connected to a power supply.
- Daylight Saving Time Adjustment:Remember to reset your clock by hand for a daylight saving change.
- Correct Incorrect Displays: If the clock is displaying incorrect information, check that all settings (including date and time format) are correctly set.
- Setup Reset: If there is an error, try turning the clock off and on again to reset the setup.
Require a Digital Calendar Clock? Shenzhen Yijing Technology Co., Ltd. is the place to look.
Shenzhen Yijing Technology Co., Ltd. is a firm that specializes in the production of digital display solutions with a range of products bearing the brand name YIAISIGN. They specialize in the production of quality digital photo frames, calendar clocks, among others.
YIAISIGN Digital Calendar Clocks come with easy-to-use features such as:
- Clear, Low-Glare Display:With automatic dimming, it is convenient to read the clock in varying lighting conditions.
- In-Depth Reminders: Alarms and reminders for medications to keep you in line.
- Quick Setup:Plug-and-play with easy operation.
- Durable, Eco-Friendly Materials: For reliable durability.
- Personalized Display: Comes with multiple display modes to suit your style.
YIAISIGN products offer practical and reliable digital clock solutions when you need a clock for personal use, as a gift, or as a memory aid.
To simplify daily life for customers in search of digital calendar clocks that are easy to use, Shenzhen Yijing Technology Co., Ltd. offers quality products.


